
Learning How to Install Ledger Live Step by Step Setup Guide does not have to be hard. This guide walks you through every phase. You need a Ledger hardware device and a computer. The software controls your crypto assets. Following these steps ensures a smooth start. Using a cold wallet keeps your coins safe from online threats. This article provides a clear path for new users. Each section explains a key part of the process.
Getting your wallet ready involves a few actions. Downloading the app begins the journey. Connecting the device confirms the setup. Creating a recovery phrase protects your funds. Managing tokens and accounts comes next. This Ledger Live installation guide covers all those steps. You can finish the whole setup in under thirty minutes. The process suits beginners and experienced users alike.
What You Need Before Installing the Ledger Live App
Starting the process requires some items. You must own a Ledger hardware wallet. Models include the Nano S Plus and Nano X. You also need a computer with an internet connection. A USB cable comes with the device. Your operating system should be Windows, macOS, or Linux. Checking system requirements before you set up Ledger Live saves time. The app works with both desktop and mobile versions.
Hardware Wallet Models Compared
Choosing the right model matters for your needs. Each model supports different features. Storage capacity varies between devices. Bluetooth connectivity is available only on the Nano X. The Nano S Plus offers more memory than the older Nano S. All models connect via USB for initial setup. Your choice affects how you use the app.
| Model | Price (USD) | Compatibility | Use Case |
|---|---|---|---|
| Ledger Nano S Plus | $79 | Windows, macOS, Linux, Android, iOS | Crypto storage for up to 100 apps |
| Ledger Nano X | $149 | Windows, macOS, Linux, Android, iOS | Mobile use with Bluetooth |
| Ledger Stax | $279 | Windows, macOS, Linux, Android, iOS | Large touchscreen, NFT display |
Computer and Cable Prerequisites
Your computer needs a free USB port. Use the original cable that comes with the device. Third party cables can cause connection errors. Keep your operating system updated. Browser extensions are not required for desktop use. Mobile users must download the companion app. Ensure your internet is stable during the setup.
Backup Tools You Should Prepare
Write down your recovery phrase on paper. Do not store it digitally. A metal backup plate adds extra protection. Keep the phrase in a safe location. You need this phrase to restore access. Losing the phrase means losing your funds. Preparing these tools before you set up Ledger Live prevents delays.
Downloading the Ledger Live Application
Getting the correct software is your first action. Visit the official Ledger website only. Avoid third party download sites. The app is free for all users. Your operating system determines the download file type. This Ledger Live installation guide recommends checking the file size after download. A small file may indicate a tampered version.
Steps to Download on Windows
- Open a browser and go to ledger.com
- Click on the “Download” button for desktop
- Select the Windows installer (.exe file)
- Wait for the download to finish
- Verify the file size matches the official listing
Steps to Download on macOS
- Navigate to the official Ledger website
- Choose the macOS version (.dmg file)
- Open the downloaded file
- Drag the Ledger Live icon into the Applications folder
- Confirm the app is not blocked by security settings
Steps to Download on Linux
- Access the official download page
- Select the Linux AppImage version
- Allow the file to execute after download
- Right click the file and select “Properties”
- Check the “Allow executing file as program” box
Running the Ledger Live Setup Wizard
After downloading, open the installer. The Ledger Live setup wizard guides you through the installation. Accept the terms of service to continue. Choose the installation folder or keep the default. The wizard installs drivers for your device. Following the on screen prompts ensures a correct installation. Do not skip any step during this phase.
First Launch and Language Selection
Open Ledger Live after installation. Select your preferred language from the list. English is the default option. The app will check for updates automatically. A stable internet connection is needed for this check. Updating to the latest version ensures compatibility. Older versions may not support new coins.
Device Connection During Setup
Plug your Ledger device into the computer using the USB cable. The setup wizard detects the device automatically. Follow the instructions on the device screen. Press both buttons to confirm actions. The device must remain connected throughout this process. Disconnecting during setup can cause errors.
Connecting Your Ledger Device for the First Time
Your device needs initialization before use. The app will ask you to choose between setting up a new device or restoring an old one. For first time users, select “Initialize a new device.” This process creates a new private key. The key stays on the device and never leaves it. You also protect your wallet with a PIN code. Learn more about Ledger Live PIN code security features.
Choosing a PIN Code
- Enter a PIN between 4 and 8 digits
- Confirm the PIN by entering it again
- Use a number you can remember easily
- Avoid obvious combinations like 1234
- Do not share your PIN with anyone
Device Name and Customization
You can name your device for easy identification. This name appears in the app dashboard. Use a name that helps you recognize the device. Multiple devices can be managed within one account. Customization options are limited to the name only. The name has no effect on security.
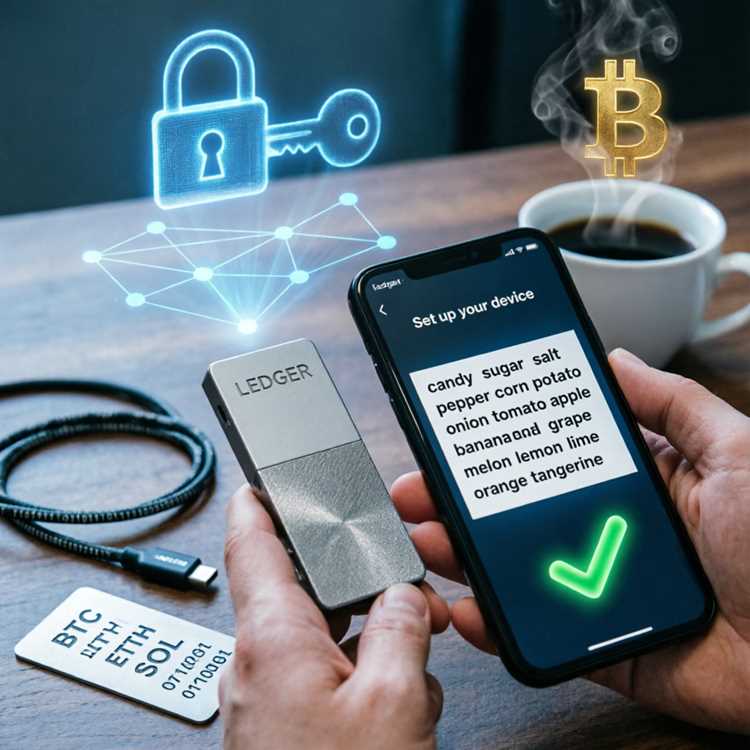
Creating Your Recovery Phrase and PIN Code
Your recovery phrase is the most important element. The device generates a 24 word phrase for you. Write down every word in the correct order. Do not make digital copies or take photos. The phrase is the only way to recover funds if the device is lost. This Ledger Live getting started step requires full attention. Mistakes during this phase can lead to permanent loss.
Writing the Phrase Correctly
- Use the paper sheet provided in the box
- Write each word legibly
- Number the words from 1 to 24
- Double check the spelling of each word
- Store the paper in a fireproof safe
Verifying the Recovery Phrase
The device will ask you to confirm some words. This verification ensures you wrote them down correctly. Pick the correct word from a list on the device screen. Completing this step activates the device. The phrase must never be entered into any computer. Entering it online compromises your security.
Setting Up Your Portfolio with Ledger Live
Once the device is ready, the app shows your portfolio view. This dashboard displays your total balance and transaction history. Adding assets requires installing the corresponding app on your device. Each blockchain needs a separate app. The Ledger Live asset management tool helps organize your holdings. You can track multiple coins in one place.
Installing Blockchain Apps on the Device
- Open the Manager tab in Ledger Live
- Find the app for your desired coin
- Click “Install” and confirm on the device
- Wait for the installation to complete
- The app appears in the device menu
Adding Accounts for Different Assets
After installing an app, you can add an account. The app creates a receive address for that asset. Each account tracks its own transaction history. You can add multiple accounts for the same coin. Rename each account to stay organized. This step is part of the Ledger Live getting started process.
Managing Tokens and Adding Sub Accounts
Tokens like ERC-20 require special handling. They operate on top of a parent blockchain like Ethereum. Ledger Live can manage these tokens within the same account. You do not need a separate app for each token. The platform handles token balances automatically. For details, see the Ledger Live ERC-20 management guide. Creating Ledger Live sub-accounts helps separate funds for different purposes.
Viewing Token Balances
- Open the Ethereum account in Ledger Live
- Scroll down to see the token list
- Tokens appear automatically when received
- Hidden tokens can be added manually
- Each token shows its balance and value
Creating Sub Accounts for Organization
- Click on the “+” icon next to an account
- Select the type of sub account
- Name the sub account for clarity
- Use sub accounts to separate savings and spending
- Each sub account has its own transaction history
Using Ledger Live for Staking and Swaps
Ledger Live allows you to earn rewards through staking. Supporting coins include Tezos, Cosmos, and Ethereum. You can delegate your coins to validators directly from the app. The process takes a few clicks. Learn how to stake crypto Ledger style and earn passive income. Swapping tokens within the app is also possible. The Ledger Live swap feature allows direct exchanges between supported assets.
Staking Requirements
- Minimum balance varies by coin
- Staking requires the device to be connected
- Rewards are distributed automatically
- Unbonding periods can last up to 28 days
- Fees for staking are taken from rewards
Executing a Swap
- Open the Swap tab in Ledger Live
- Select the coin you want to exchange
- Choose the coin you want to receive
- Enter the amount to swap
- Confirm the transaction on your device
Exploring Supported Coins and NFTs
Ledger Live supports over 100 different coins and tokens. Major blockchains include Bitcoin, Ethereum, and Solana. Each coin requires its own app on the device. The Ledger Live supported coins list updates regularly. New coins are added through firmware updates. NFTs are also supported for Ethereum and Polygon. The Ledger Live NFT feature lets you view and manage Non Fungible Tokens.
Viewing NFT Collections
- Open the NFT tab in Ledger Live
- Your NFTs appear as a gallery
- Click on an NFT to see its details
- Transaction history for each NFT is visible
- You can send NFTs directly from the app
Adding New Coins Manually
- Go to the Manager tab
- Search for the coin by name
- Install the corresponding app
- The coin appears in your portfolio
- Add an account to start tracking
Frequently Asked Questions about Ledger Live Installation
Q: Can I use Ledger Live without a hardware device?
No. You need a Ledger device to create accounts and sign transactions. The app alone cannot generate private keys.
Q: How long does the installation take?
Downloading and installing the app takes about 10 minutes. Device initialization and phrase creation add another 15 minutes.
Q: What happens if I lose my recovery phrase?
Your funds become permanently inaccessible. No one, including Ledger, can recover the phrase for you.
Q: Is Ledger Live free to use?
Yes. The app is free. Fees apply only for network transactions and swap services.
Q: Can I use the same device on multiple computers?
Yes. Install Ledger Live on each computer. Connect your device to manage your accounts from any machine.